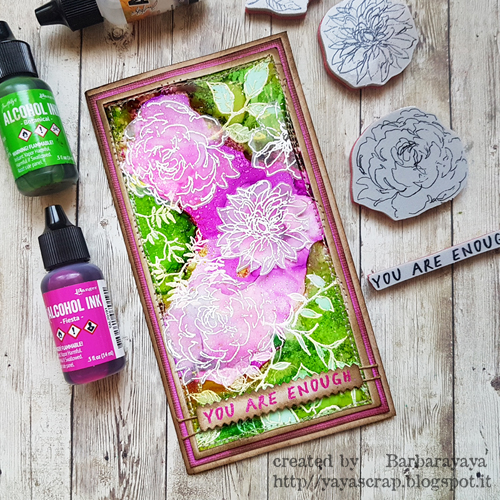
The card is very colorful, below you will find the step by step explanation. I hope you find it useful!
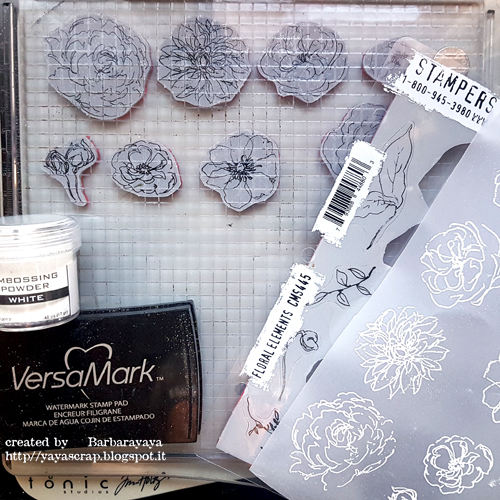
1) La prima cosa che ho fatto è stata quella di timbrare alcuni fiori del set Floral elements su un foglio di Vellum con polvere da embossing bianca. e ritagliarli.
1) The first thing I did was to stamp some flowers from the Floral Elements stamp set, on a sheet of Vellum with white embossing powder and cut them out.
2) Per il background della card ho utilizzato la Yupo Paper nella versione Heavystock. Ho usato la carta più spessa tra le varie tipologie di Yupo perchè avevo già in mente di utilizzare la polvere da embossing e quindi su quella sottile avrei avuto molte più difficoltà.
Ho utilizzato gli Alcohol Ink nelle tonalità rosa/fucsia e verde creando una specie di schema nel quale avrei potuto inserire i fiori già timbrati e creare un motivo floreale con le foglie.
2) For the background of my card I used the Yupo Paper in the Heavystock version. I used the thickest paper among the various types of Yupo because I already had in mind to use embossing powder and therefore I would have had more difficulty on the thin one.
I used the Alcohol Ink in pink/fuchsia and green shades creating a kind of color scheme in which I could insert the pre-stamped flowers and create a floral design with the leaves.
3) Il terzo step è stato proprio sistemare i timbri e cercare una composizione che mi piacesse e si adattasse ai fiori. Una volta trovata la composizione adatta ho timbrato anche le foglie con polvere da embossing bianca e l'indispensabile aiuto della Platform.
3) The third step was just arranging the stamps and looking for a composition that I liked and suited the flowers. Once I found the right composition, I also stamped the leaves with white embossing powder and the indispensable help of the Platform
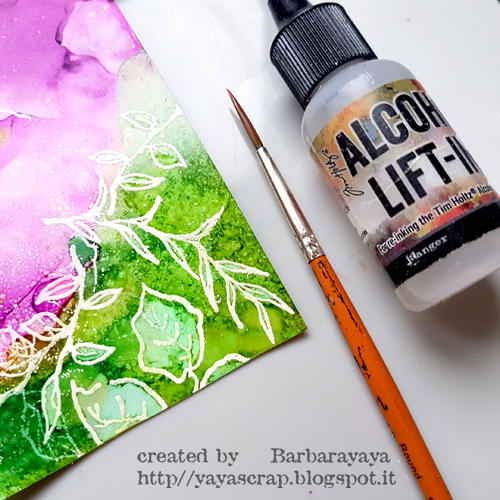
4) Dopo aver realizzato la composizione con Alcohol Ink Lift Re-inker e un pennellino ho tolto colore all'interno di alcune foglie per evidenziare la differenza di tonalità tra lo sfondo e le foglie.
4) After making the composition, I took Alcohol Ink Lift Re-inker and a brush, I removed the color inside some leaves to highlight the difference in tone between the background and the leaves.
5) Ultimo step il sentiment che ho scelto dal set Noteworthy, una bella frase che "You Are Enough" che aiuta l'autostima... e io ne ho sempre bisogno! L'ho timbratao utilizzando un inchiostro bianco e la povere Glaze nel colore Picked Raspberry. Infine ho posizionato i fiori timbrati sul vellum e li ho incollati.
Sotto qualche dettaglio.
5) Last step, the sentiment I chose from the Noteworthy stamp set, a beautiful phrase "You Are Enough" that helps self-esteem ... and I always need it! I stamped it using white ink and the Glaze Powder in Picked Raspberry color. Finally, I placed the stamped flowers on the vellum and glued them.
Below you can see some details.
Spero vi sia piaciuta e spero nelle prossime settimane di riuscire un altro tutorial sempre relative alle card che ho realizzato per la Live di Tim Holtz. Se l'avete persa la potete rivedere QUI sul blog di Tim Holtz dove potrete ammirare anche tutte le cards dei favolosi Makers che hanno lavorato per questo lancio.
Grazie per essere passati!
I hope you enjoyed it and I hope in the coming weeks to succeed to post another tutorial related to the cards that I made for Tim Holtz's Live. If you have lost it you can find the replay and all the cards of the fabulous Makers who worked for this launch on Tim Holtz's blog!
Thanks for stopping by!
Barbara


Nessun commento:
Posta un commento